搭建CAS6.3服务端 零、注意 版本推荐使用 :6.3.7.4 , 该版本修复了log4j2的漏洞!
一、下载 github下载Cas: https://github.com/apereo/cas-overlay-template
选择6.3版本下载。
cas 6.x 都是使用的gradle进行构建的。
其中cas6.3 需要的环境 jdk11 + tomcat9.0.43 + gradle-6.8.1
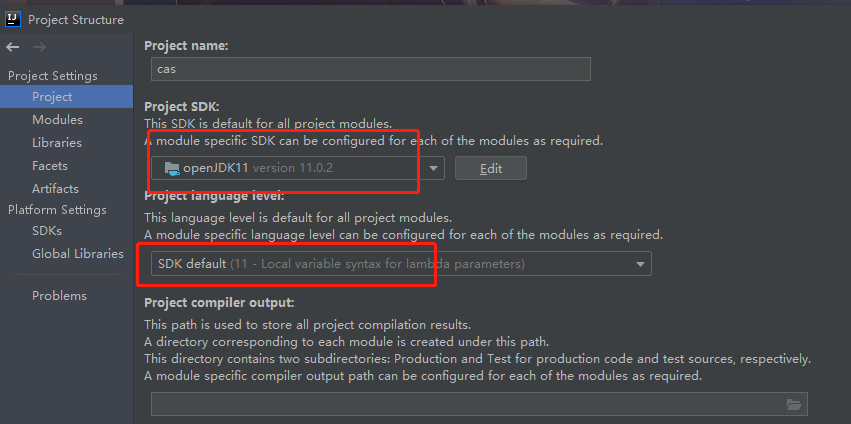
二、使用Idea打开并进行编译 2.1 基本配置 打开项目后需要在 project-structure 中选择jdk 11 , 在 setting 的 gradle 配置中也选择 jdk 11
然后刷新等待依赖加载完成!
这里我碰到一个很傻逼的问题,我开了vpn在进行下载依赖,然后疯狂的给我报错,依赖下载不出来。后来我把vpn关了结果可以了!!!!
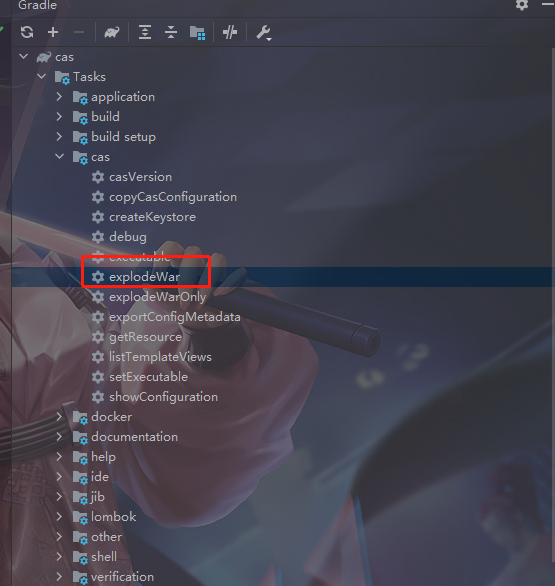
2.2 打包
运行这个后 打包的东西会出现在 build目录下。其中war包出现在 libs里面
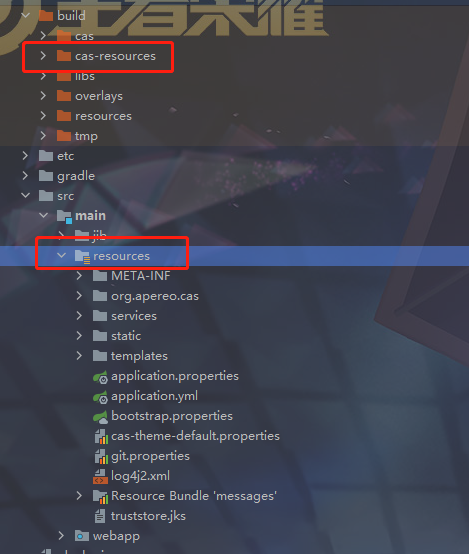
在这里需要进行一些操作,将build目录下的 cas-resource 目录复制到 src/main下面,并重命名为 resource , 这个操作是为了后面我们自定义cas做铺垫
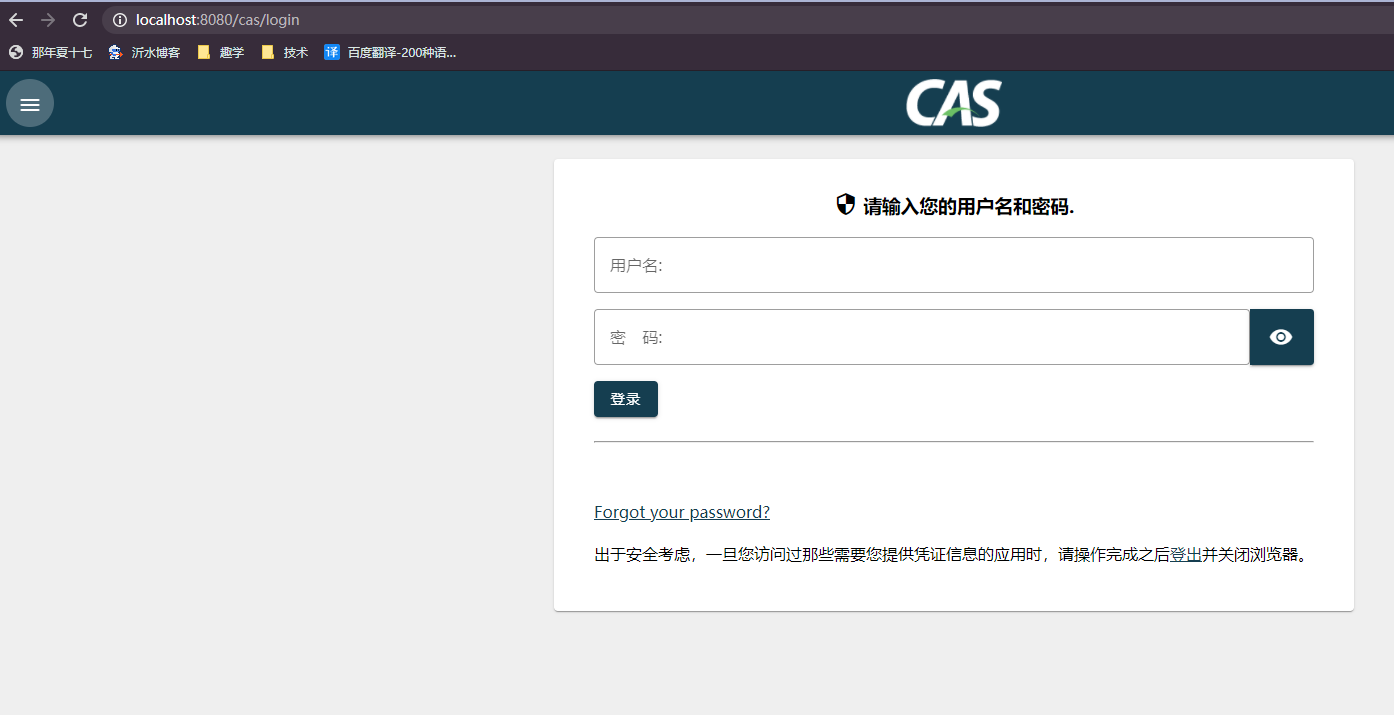
2.3 运行 将 build/libs 里的 cas.war 复制到 tomcat的webapps 中,运行tomcat,成功后在 浏览器中访问 localhost:8080/cas
在登录页面输入静态的用户名:casuser 密码:Mellon
ps:这里讲下如果电脑装了多个jdk,且环境变量里面配置的jdk不为 jdk11 时,如何给tomcat配置我们需要的jdk11
在 tomcat的bin目录下修改 setclasspath.bat 在首行添加如下文字
1 set JAVA_HOME=E:\Java\openJDK\jdk-11.0.2
三、配置HTTPS 。 请看这里:TOMCAT配置 https.note
四、配置数据库连接 该部分文档在 : https://apereo.github.io/cas/6.3.x/installation/Database-Authentication.html
在Idea打开项目 。在build.gradle 的 dependencies 里面 加入如下依赖
1
2
3
implementation "org.apereo.cas:cas-server-support-jdbc:${casServerVersion}" implementation "org.apereo.cas:cas-server-support-jdbc-drivers:${casServerVersion}" implementation "mysql:mysql-connector-java:8.0.15" //注意自己的mysql版本
在 application.properties 中加入如下
首先是关闭 静态配置
1 2 3 4 5 6 7 8 9 10 11 12 13 14 15 16 17 18 19 cas.authn.jdbc.query[0].user =root cas.authn.jdbc.query[0].password =123456 cas.authn.jdbc.query[0].driver-class =com.mysql.jdbc.Driver cas.authn.jdbc.query[0].url =jdbc:mysql://localhost:3306/cas_server?serverTimezone=UTC&allowMultiQueries=true cas.authn.jdbc.query[0].sql =SELECT * FROM sys_user WHERE username=? cas.authn.jdbc.query[0].field-password =pwd cas.authn.jdbc.query[0].field-disabled =disabled cas.authn.jdbc.query[0].password-encoder.type =BCRYPT cas.authn.jdbc.query[0].principal-attribute-list =sn,cn:commonName,givenName
五、自定义认证方式 该部分文档在:https://apereo.github.io/cas/6.3.x/installation/Configuring-Custom-Authentication.html
首先需要添加依赖
1
2
implementation "org.apereo.cas:cas-server-core-authentication-api:${casServerVersion}" implementation "org.apereo.cas:cas-server-core-configuration-api:${casServerVersion}"
大致流程如下
编写处理程序类 实现AuthenticationHandler接口
注册到身份验证引擎中去
配置spring.factories
5.1 普通的 用户,密码 验证策略 如果只是简单的用户密码验证策略我们只需要继承 AbstractUsernamePasswordAuthenticationHandler 这个类重写其 authenticateUsernamePasswordInternal 方法如下代码
1
2
3
4
5
6
7
8
9
10
11
12
13
14
15
16
17
18
19
20
21
22
23
24
25
26
27
28
29
30
31
32
33
34
35
36
37
38
39
40
41
42
43
44
45
46
47
48
49
50
51
52
53
54
55
56
57
58
59
60
61
62
63
64
65
66
67
68
69
70
71
72
73
74
75
76
77
78
79
80
81
package com.qx.cas.authentication;import com.qx.cas.model.User;import org.apereo.cas.authentication.AuthenticationHandlerExecutionResult;import org.apereo.cas.authentication.MessageDescriptor;import org.apereo.cas.authentication.PreventedException;import org.apereo.cas.authentication.credential.UsernamePasswordCredential;import org.apereo.cas.authentication.handler.support.AbstractUsernamePasswordAuthenticationHandler;import org.apereo.cas.authentication.principal.Principal;import org.apereo.cas.authentication.principal.PrincipalFactory;import org.apereo.cas.services.ServicesManager;import org.springframework.jdbc.core.BeanPropertyRowMapper;import org.springframework.jdbc.core.JdbcTemplate;import org.springframework.security.crypto.bcrypt.BCryptPasswordEncoder;import org.springframework.security.crypto.password.PasswordEncoder;import javax.security.auth.login.AccountException;import javax.security.auth.login.FailedLoginException;import java.security.GeneralSecurityException;import java.util.*;public class FormAuthentication extends AbstractUsernamePasswordAuthenticationHandler { public static final PasswordEncoder PASSWORD_ENCODER = new BCryptPasswordEncoder (); private final JdbcTemplate jdbcTemplate; protected FormAuthentication (String name, ServicesManager servicesManager, PrincipalFactory principalFactory, Integer order , JdbcTemplate jdbcTemplate) { super (name, servicesManager, principalFactory, order); this .jdbcTemplate = jdbcTemplate; } @Override protected AuthenticationHandlerExecutionResult authenticateUsernamePasswordInternal (UsernamePasswordCredential credential, String originalPassword) throws GeneralSecurityException, PreventedException { String username = credential.getUsername(); String password = credential.getPassword(); System.out.println("自定义认证处理器" ); System.out.println("username : " + username); System.out.println("password : " + password); String sql = "select * from sys_user where username = ?" ; User user = jdbcTemplate.queryForObject(sql, new Object []{username}, new BeanPropertyRowMapper <>(User.class)); System.out.println(username + "用户信息如下" ); System.out.println(user); if (user == null ){ System.out.println("用户不存在" ); throw new AccountException ("Sorry, username not found!" ); } if (!PASSWORD_ENCODER.matches(password,user.getPwd())){ System.out.println("密码错误!" ); throw new FailedLoginException ("密码错误!" ); } final List<MessageDescriptor> list = new ArrayList <>(); Principal principal = this .principalFactory.createPrincipal(username, this .obtainAttributes(user)); return createHandlerResult(credential, principal , list); } private Map<String,List<Object>> obtainAttributes (User user) { HashMap<String, List<Object>> attributes = new HashMap <>(10 ); attributes.put("username" , Collections.singletonList(user.getUsername())); attributes.put("nickname" ,Collections.singletonList(user.getNickname())); attributes.put("email" ,Collections.singletonList(user.getEmail())); attributes.put("disabled" ,Collections.singletonList(user.getDisabled())); return attributes; } }
注册到认证引擎中去
1
2
3
4
5
6
7
8
9
10
11
12
13
14
15
16
17
18
19
20
21
22
23
24
25
26
27
28
29
30
31
32
33
34
35
36
37
38
39
40
41
package com.qx.cas.authentication;import lombok.RequiredArgsConstructor;import org.apereo.cas.authentication.AuthenticationEventExecutionPlan;import org.apereo.cas.authentication.AuthenticationEventExecutionPlanConfigurer;import org.apereo.cas.authentication.AuthenticationHandler;import org.apereo.cas.authentication.principal.DefaultPrincipalFactory;import org.apereo.cas.configuration.CasConfigurationProperties;import org.apereo.cas.services.ServicesManager;import org.springframework.boot.context.properties.EnableConfigurationProperties;import org.springframework.context.annotation.Bean;import org.springframework.context.annotation.Configuration;import org.springframework.jdbc.core.JdbcTemplate;@Configuration("CustomAuthenticationConfiguration") @EnableConfigurationProperties(CasConfigurationProperties.class) @RequiredArgsConstructor public class FormAuthenticationConfiguration implements AuthenticationEventExecutionPlanConfigurer { private final ServicesManager servicesManager; private final JdbcTemplate jdbcTemplate; @Bean public AuthenticationHandler formAuthenticationHandler () { return new FormAuthentication (FormAuthentication.class.getName(), servicesManager, new DefaultPrincipalFactory (), 1 ,jdbcTemplate); } @Override public void configureAuthenticationExecutionPlan (AuthenticationEventExecutionPlan plan) { plan.registerAuthenticationHandler(formAuthenticationHandler()); } }
编辑 src/main/resources/META-INF/spring.factories 如果没有创建一个
1 org.springframework.boot.autoconfigure.EnableAutoConfiguration =com.qx.cas.authentication.FormAuthenticationConfiguration
注意的地方,由于我们的验证手段还是基于数据库来的,所以我们还是要进行数据库的配置,因为我们是使用springboot容器中的jdbcTemplate 所以我们还是配置springboot 的数据库! 第四节添加的 jdbc依赖不要删除
1
2
3
4
5
# springboot 数据库连接 spring.datasource.url=jdbc:mysql://localhost:3306/cas_server?serverTimezone=UTC&allowMultiQueries=true spring.datasource.hikari.username=root spring.datasource.hikari.password=123456 spring.datasource.driver-class-name=com.mysql.cj.jdbc.Driver
5.2 更自由的自定义认证 可能还有读者提出疑问,我提交的信息不止用户名和密码,那该如何自定义认证?
这里就要我们继承AbstractPreAndPostProcessingAuthenticationHandler这个借口,其实上面的AbstractUsernamePasswordAuthenticationHandler就是继承实现的这个类,它只是用于简单的用户名和密码的校验。
然后实现其接口!
5.3 自定义用户属性 使用方法 this.principalFactory.createPrincipal 获得 Principal 即可
官方文档:https://apereo.github.io/cas/6.3.x/integration/Attribute-Resolution.html
六、应用service的管理 官网相关文档:https://apereo.github.io/cas/6.3.x/services/Service-Management.html
6.1 使用jpa存储service https://apereo.github.io/cas/6.3.x/services/JPA-Service-Management.html
添加依赖
1 implementation "org.apereo.cas:cas-server-support-jpa-service-registry:${casServerVersion}"
application.properties 添加以下配置
1
2
3
4
5
6
7
8
9
10
11
12
13
14
15
16
17
18
19
20
21
22
23
24
25
26
27
28
cas.serviceRegistry.jpa.user =root cas.serviceRegistry.jpa.password =123 cas.serviceRegistry.jpa.driverClass =com.mysql.jdbc.Driver cas.serviceRegistry.jpa.url =jdbc:mysql://127.0.0.1:3306/cas?useUnicode=true&characterEncoding=UTF-8&autoReconnect=true&useSSL=false cas.serviceRegistry.jpa.dialect =org.hibernate.dialect.MySQL8Dialect cas.serviceRegistry.jpa.failFastTimeout =1 cas.serviceRegistry.jpa.healthQuery =cas.serviceRegistry.jpa.isolateInternalQueries =false cas.serviceRegistry.jpa.leakThreshold =10 cas.serviceRegistry.jpa.batchSize =1 cas.serviceRegistry.jpa.ddlAuto =update cas.serviceRegistry.jpa.autocommit =true cas.serviceRegistry.jpa.idleTimeout =5000 cas.serviceRegistry.jpa.pool.suspension =false cas.serviceRegistry.jpa.pool.minSize =6 cas.serviceRegistry.jpa.pool.maxSize =18 cas.serviceRegistry.jpa.pool.maxWait =2000 cas.serviceRegistry.jpa.pool.timeoutMillis =1000
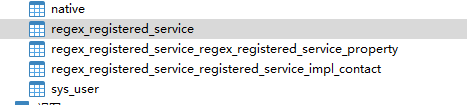
然后启动cas , 会发现他会在数据库新建几张表如下 , sys_user是我自己加的用户表,不是生成的!!
这里提一个问题,就是在第四节我们配置了 spirngboot的数据源,但是在我们使用了jpa后是需要注释掉的,不然会启动不起来!注释掉jdbcTemplate依然是可以用的
6.2 cas-management-overlay https://apereo.github.io/cas-management/6.3.x/installation/Installing-ServicesMgmt-Webapp.html
下载下来后直接编译即可!
这里先阐述一个东西,cas-management 是 cas-server 下的一个应用(service) , 所以cas-management启动时会先去请求cas-server。如果cas-server访问不了那么cas-management 启动时会卡住。
那么通过这个问题,我们就可以预料到,cas-management 和 cas-server 不能放在同一个tomcat下!!!!
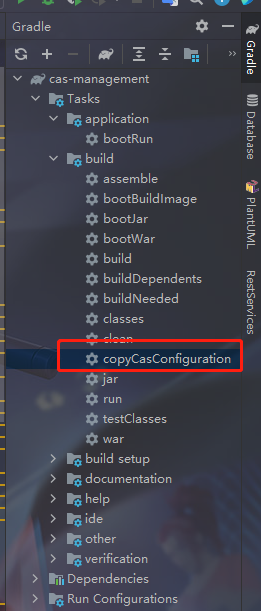
配置的话我们修改 etc/cas/config/management.properties 文件即可,我们修改了配置文件可以运行gradle的copyCasConfuration
这时候会将目录下的etc/cas/config目录复制到该盘的跟目录下的 etc/cas/config ,到时候 cas-management 会去跟目录找 etc/cas/config ,从而实现自定义配置。
windows 下开发的话,请一定记得 tomcat的盘要与 etc/cas/config 盘一致!!!
我们直接使用jpa来存储service!
首先添加依赖:
1
2
3
4
implementation "org.apereo.cas:cas-server-support-jdbc:${casServerVersion}" implementation "org.apereo.cas:cas-server-support-jdbc-drivers:${casServerVersion}" implementation "mysql:mysql-connector-java:8.0.15" implementation "org.apereo.cas:cas-server-support-jpa-service-registry:${casServerVersion}"
然后配置文件
1 2 3 4 5 6 7 8 9 10 11 12 13 14 15 16 17 18 19 20 21 22 23 24 25 26 27 28 29 30 31 32 33 34 35 36 37 38 39 40 41 42 43 44 45 46 47 48 cas.server.name =http://localhost:8080 cas.server.prefix =${cas.server.name}/cas mgmt.server-name =http://localhost:8081 mgmt.adminRoles[0] =ROLE_ADMIN mgmt.userPropertiesFile =file:/etc/cas/config/users.json logging.config =file:/etc/cas/config/log4j2-management.xml cas.service-registry.initFromJson =false cas.serviceRegistry.jpa.user =root cas.serviceRegistry.jpa.password =123456 cas.serviceRegistry.jpa.driverClass =com.mysql.cj.jdbc.Driver cas.serviceRegistry.jpa.url =jdbc:mysql://localhost:3306/cas_server?serverTimezone=UTC&allowMultiQueries=true cas.serviceRegistry.jpa.dialect =org.hibernate.dialect.MySQL8Dialect cas.serviceRegistry.jpa.failFastTimeout =1 cas.serviceRegistry.jpa.healthQuery =cas.serviceRegistry.jpa.isolateInternalQueries =false cas.serviceRegistry.jpa.leakThreshold =10 cas.serviceRegistry.jpa.batchSize =1 cas.serviceRegistry.jpa.pool.suspension =false cas.serviceRegistry.jpa.pool.minSize =6 cas.serviceRegistry.jpa.pool.maxSize =18 cas.serviceRegistry.jpa.pool.maxWait =5000 cas.serviceRegistry.jpa.pool.timeoutMillis =1000 cas.serviceRegistry.jpa.ddlAuto =none cas.serviceRegistry.jpa.autocommit =true cas.serviceRegistry.jpa.idleTimeout =5000
因为添加了 jpa的相关依赖,所以需要重新打包部署,不然的话我们修改下配置文件重启即可!!
七、自定义登录界面和表单信息 博客:https://blog.csdn.net/Anumbrella/article/details/82728641 https://apereo.github.io/cas/6.3.x/ux/User-Interface-Customization.html
暂无
八、OAuth2 Server支持 官方文档:https://apereo.github.io/cas/6.3.x/installation/OAuth-OpenId-Authentication.html#administrative-endpoints
8.1 快速开始 添加依赖
1
2
// oauth2 server 支持 implementation "org.apereo.cas:cas-server-support-oauth-webflow:${casServerVersion}"
添加application.properties
1
2
3
4
5
6
7
8
9
10
11
12
13
#-----------------------------以下是oauth2 server的配置----------------------------- cas.authn.oauth.replicate-sessions=false cas.authn.oauth.grants.resource-owner.require-service-header=true # NESTED|FLAT cas.authn.oauth.user-profile-view-type=NESTED # code 授权码 cas.authn.oauth.code.time-to-kill-in-seconds=60 cas.authn.oauth.code.number-of-uses=1 # 访问令牌 accessToken cas.authn.oauth.access-token.time-to-kill-in-seconds=7200 cas.authn.oauth.access-token.max-time-to-live-in-seconds=28800 # 刷新令牌 RefreshToken cas.authn.oauth.refresh-token.time-to-kill-in-seconds=2592000
注册 client ,前面我们使用的service管理是 jpa提供 也就是存在数据库中,按照文档我们往数据库中添加一条数据!
然后我们自己写一个项目然后进行 oauth2 对接,发现可以!
只是返回的用户信息有点搞!
1
2
3
4
5
6
7
8
9
10
11
12
{ "service" : "http://localhost:9021/login/oauth2/code/demo" , "attributes" : { "authenticationDate" : 1619677835 , "authenticationMethod" : "com.qx.cas.authentication.FormAuthentication" , "credentialType" : "UsernamePasswordCredential" , "oauthClientId" : "demo" , "successfulAuthenticationHandlers" : "com.qx.cas.authentication.FormAuthentication" } , "id" : "admin" , "client_id" : "demo" }
于是我想开始自定义这个返回的用户信息!
8.2 自定义返回用户信息 https://apereo.github.io/cas/6.3.x/installation/OAuth-OpenId-Authentication.html#custom
新建类实现 OAuth20UserProfileViewRenderer 接口
九、自定义实现服务注册 官方文档:https://apereo.github.io/cas/6.3.x/services/Custom-Service-Management.html
如果您希望设计自己的服务注册表实现,则需要将您的ServiceRegistry实现注入 CAS。
需要添加依赖如下:
1 implementation "org.apereo.cas:cas-server-core-services:${casServerVersion}"
1、QxServiceRegistry
1 2 3 4 5 6 7 8 9 10 11 12 13 14 15 16 17 18 19 20 21 22 23 24 25 26 27 28 29 30 31 32 33 34 35 36 37 38 39 40 41 42 @Slf4j @RequiredArgsConstructor public class QxServiceRegistry implements ServiceRegistry { private final JdbcTemplate jdbcTemplate; @Override public RegisteredService save (RegisteredService registeredService) { return registeredService; } @Override public boolean delete (RegisteredService registeredService) { return true ; } @Override public Collection<RegisteredService> load () { String sql = "select * from cas_services " ; List<QxServices> list = jdbcTemplate.query(sql, new BeanPropertyRowMapper <>(QxServices.class)); return list.stream().map(QxServices::toRegisteredService).collect(Collectors.toList()); } @Override public RegisteredService findServiceById (long id) { String sql = "select * from cas_services where id = ? " ; QxServices qxServices = jdbcTemplate.queryForObject(sql, new Object []{id}, new BeanPropertyRowMapper <>(QxServices.class)); if (qxServices == null ){ throw new RuntimeException ("系统异常" ); } return qxServices.toRegisteredService(); } }
2、配置类
1 2 3 4 5 6 7 8 9 10 11 12 13 14 15 16 17 18 19 20 21 22 23 24 25 @RequiredArgsConstructor @Configuration @RefreshScope @Slf4j public class QxServiceRegistryExecutionPlanConfigurer implements ServiceRegistryExecutionPlanConfigurer { private final JdbcTemplate jdbcTemplate; @Bean @RefreshScope public QxServiceRegistry qxServiceRegistry () { return new QxServiceRegistry (jdbcTemplate); } @Override public void configureServiceRegistry (ServiceRegistryExecutionPlan plan) { plan.registerServiceRegistry(qxServiceRegistry()); } }
十、使用Redis存储票证 https://apereo.github.io/cas/6.3.x/ticketing/Redis-Ticket-Registry.html
添加依赖
1 implementation "org.apereo.cas:cas-server-support-redis-ticket-registry:${casServerVersion}"
添加application配置
1 2 3 4 5 6 7 8 cas.ticket.registry.redis.host =192.168.31.111 cas.ticket.registry.redis.database =5 cas.ticket.registry.redis.port =6379 cas.ticket.registry.redis.password =123456 cas.ticket.registry.redis.timeout =2000 cas.ticket.registry.redis.use-ssl =false cas.ticket.registry.redis.read-from =MASTER
十一、添加应用的用户访问权限 我们搭一个service的目的肯定是实现多应用的认证,但其实业务中我们会出现某些应用只给一部分人使用,但在cas官方文档中并没有找到相应的功能。
于是我在他们的源码中找到一个 RedirectToServiceAction 类,该类的作用是 用户认证成功后跳转到应用端。
其实更好的方法是在生成 ServiceTicket之前加上 权限判断逻辑,负责生成ServiceTicket的代码在这里 GenerateServiceTicket。
怎么看源码推荐一个博客:https://www.yht7.com/news/107580 。
而且该类是通过注入spring容器中而生效的,所以我们只要通过注册一个名字一样的bean即可覆盖该类。
cas中大多bean都是加上了 @ConditionalOnMissingBean(name = “”) 注解,我们可以注入相同名的bean来达到覆盖cas提供的bean的目的。
添加依赖
1
2
3
// 自定义应用的用户访问权限代码 implementation "org.apereo.cas:cas-server-core-webflow-api:${casServerVersion}" implementation "org.apereo.cas:cas-server-core-web-api:${casServerVersion}"
添加代码
首先先把我们的用户可以是否可以访问应用的逻辑写出来,这里取名叫 UserServiceVisitCheck,如下。
接口 UserServiceVisitCheck
1 2 3 4 5 6 7 8 9 10 11 12 13 14 15 16 17 18 19 public interface UserServiceVisitCheck { boolean check (Long serviceId,String username) ; }
实现类 DefaultUserServiceVisitCheckImpl
1 2 3 4 5 6 7 8 9 10 11 12 13 14 15 16 17 18 @Component @Slf4j public class DefaultUserServiceVisitCheckImpl implements UserServiceVisitCheck { @Override public boolean check (Long serviceId, String username) { log.info("开始检测当前登录的用户是否有该应用的访问权限!" ); log.info("service的主键是:{},当前登录用户名是:{}" ,serviceId,username); return true ; } }
我们自己写的 RedirectToServiceAction。
1 2 3 4 5 6 7 8 9 10 11 12 13 14 15 16 17 18 19 20 21 22 23 24 25 26 27 28 29 30 31 32 33 34 35 36 37 38 39 40 41 42 43 44 45 46 47 48 49 50 51 52 53 54 @Slf4j @Component("redirectToServiceAction") @RefreshScope public class QxRedirectToServiceAction extends RedirectToServiceAction { private final ResponseBuilderLocator<WebApplicationService> responseBuilderLocator; private final UserServiceVisitCheck userServiceVisitCheck; public QxRedirectToServiceAction (ObjectProvider<ResponseBuilderLocator<WebApplicationService>> responseBuilderLocator , UserServiceVisitCheck userServiceVisitCheck) { super (responseBuilderLocator.getObject()); this .responseBuilderLocator = responseBuilderLocator.getObject(); this .userServiceVisitCheck = userServiceVisitCheck; } @Override protected Event doExecute (final RequestContext requestContext) { val service = WebUtils.getService(requestContext); log.debug("Located service [{}] from the context" , service); val auth = WebUtils.getAuthentication(requestContext); log.debug("Located authentication [{}] from the context" , auth); val registeredService = WebUtils.getRegisteredService(requestContext); Long serviceId = registeredService.getId(); String username = auth.getPrincipal().getId(); if (!userServiceVisitCheck.check(serviceId,username)){ throw new UnauthorizedServiceException (UnauthorizedServiceException.CODE_UNAUTHZ_SERVICE, "你没有访问该应用的权限" ); } val serviceTicketId = WebUtils.getServiceTicketFromRequestScope(requestContext); log.debug("Located service ticket [{}] from the context" , serviceTicketId); val builder = responseBuilderLocator.locate(service); log.debug("Located service response builder [{}] for [{}]" , builder, service); val response = builder.build(service, serviceTicketId, auth); log.debug("Built response [{}] for [{}]" , response, service); return finalizeResponseEvent(requestContext, service, response); } }
这里直接通过继承cas提供的 RedirectToServiceAction ,重写里面的 doExecute 方法。
这里可以对比下两个 doExecute 方法,我们自己只是加了一段验证 用户是否具有访问该应用的权限 的逻辑
十二、OAuth2扩展端点 CasServer对oauth2的支持,在获取用户信息时使用的是 profile端点,但是该端点返回的用户信息不太友好,需要用 8.2 的方法来自定义用户信息,而且在通过authorization_code或者是client_credentials时都是使用的该端点去获取认证信息。而在client_credentials认证方式时,是获取不到用户信息的,所以我就在想将profile端点拆成两个。
valid 用于验证access_token是否有效,且返回认证的clientId
userinfo 返回登录的用户信息
接下来就是实现方法了。直接贴代码了
1
2
3
4
5
6
7
8
9
10
11
12
13
14
15
16
17
18
19
20
21
22
23
24
25
26
27
28
29
30
31
32
33
34
35
36
37
38
39
40
41
42
43
44
45
46
47
48
49
50
51
52
53
54
55
56
57
58
59
60
61
62
63
64
65
66
67
68
69
70
71
72
73
74
75
76
77
78
79
80
81
82
83
84
85
86
87
88
89
90
91
92
93
94
95
96
97
98
99
100
101
102
103
104
105
106
107
108
109
110
111
112
113
114
115
116
117
118
119
120
121
122
123
124
125
126
127
128
129
130
131
132
133
134
135
136
137
138
139
140
141
142
143
144
145
146
147
148
149
150
151
152
153
154
155
156
157
158
159
160
161
162
163
164
165
166
167
168
169
170
171
172
173
package com.qx.cas.oauth2;@RestController @RequestMapping(value = OAuth20Constants.BASE_OAUTH20_URL) @Slf4j public class Oauth20Controller extends BaseOAuth20Controller { private final UserinfoService userinfoService; private static final String ERROR_JSON_KEY = "error" ; protected Oauth20Controller (OAuth20ConfigurationContext oAuthConfigurationContext , UserinfoService userinfoService) { super (oAuthConfigurationContext); this .userinfoService = userinfoService; } @GetMapping("userinfo") public ResponseEntity<?> userinfo(final HttpServletRequest request){ GetAccessTokenTicketResult accessTokenTicketResult = getAccessTokenTicket(request); if (accessTokenTicketResult.hasError()){ return accessTokenTicketResult.getResponseEntity(); } OAuth20AccessToken accessTokenTicket = accessTokenTicketResult.getAccessTokenTicket(); Map<String, List<Object>> attributes = accessTokenTicket.getService().getAttributes(); List<Object> objects = attributes.get(OAuth20Constants.GRANT_TYPE); if (objects == null || objects.isEmpty()){ return this .buildErrorResponseEntity("系统异常" ); } if (objects.stream().map(Object::toString).noneMatch(OAuth20GrantTypes.AUTHORIZATION_CODE.getType()::equals)){ return this .buildErrorResponseEntity("此接口仅支持grantType=authorization_code时使用!" ); } String username = accessTokenTicket.getAuthentication().getPrincipal().getId(); return new ResponseEntity <>(userinfoService.findByUsername(username),HttpStatus.OK); } @GetMapping("valid") public ResponseEntity<?> validAccessToken(final HttpServletRequest request){ GetAccessTokenTicketResult accessTokenTicketResult = getAccessTokenTicket(request); if (accessTokenTicketResult.hasError()){ return accessTokenTicketResult.getResponseEntity(); } OAuth20AccessToken accessTokenTicket = accessTokenTicketResult.getAccessTokenTicket(); return new ResponseEntity <>(this .buildClientIdHashMap(accessTokenTicket.getClientId()),HttpStatus.OK); } private GetAccessTokenTicketResult getAccessTokenTicket (final HttpServletRequest request) { String accessToken = this .getAccessTokenFromRequest(request); if (StringUtils.isBlank(accessToken)) { log.error("Missing [{}] from the request" , OAuth20Constants.ACCESS_TOKEN); return new GetAccessTokenTicketResult (this .buildErrorResponseEntity(OAuth20Constants.MISSING_ACCESS_TOKEN)); } OAuth20AccessToken accessTokenTicket = getOAuthConfigurationContext().getTicketRegistry() .getTicket(accessToken, OAuth20AccessToken.class); if (accessTokenTicket == null || accessTokenTicket.isExpired()) { log.error("Access token [{}] cannot be found in the ticket registry or has expired." , accessToken); if (accessTokenTicket != null ) { getOAuthConfigurationContext().getTicketRegistry().deleteTicket(accessTokenTicket); } return new GetAccessTokenTicketResult (buildErrorResponseEntity(OAuth20Constants.EXPIRED_ACCESS_TOKEN)); } AuthenticationCredentialsThreadLocalBinder.bindCurrent(accessTokenTicket.getAuthentication()); updateAccessTokenUsage(accessTokenTicket); return new GetAccessTokenTicketResult (accessTokenTicket); } private Map<String,Object> buildClientIdHashMap (String clientId) { Map<String, Object> result = new HashMap <>(4 ); result.put("clientId" , clientId); return result; } private ResponseEntity<Object> buildErrorResponseEntity (String errMsg) { HashMap<String, String> map = new HashMap <>(4 ); map.put(ERROR_JSON_KEY,errMsg); return new ResponseEntity <>(map, HttpStatus.UNAUTHORIZED); } protected void updateAccessTokenUsage (final OAuth20AccessToken accessTokenTicket) { val accessTokenState = (TicketState) accessTokenTicket; accessTokenState.update(); if (accessTokenTicket.isExpired()) { getOAuthConfigurationContext().getTicketRegistry().deleteTicket(accessTokenTicket.getId()); } else { getOAuthConfigurationContext().getTicketRegistry().updateTicket(accessTokenTicket); } } protected String getAccessTokenFromRequest (final HttpServletRequest request) { var accessToken = request.getParameter(OAuth20Constants.ACCESS_TOKEN); if (StringUtils.isBlank(accessToken)) { val authHeader = request.getHeader("Authorization" ); if (StringUtils.isNotBlank(authHeader) && authHeader.toLowerCase() .startsWith(OAuth20Constants.TOKEN_TYPE_BEARER.toLowerCase() + ' ' )) { accessToken = authHeader.substring(OAuth20Constants.TOKEN_TYPE_BEARER.length() + 1 ); } } log.debug("[{}]: [{}]" , OAuth20Constants.ACCESS_TOKEN, accessToken); return extractAccessTokenFrom(accessToken); } @Getter private static class GetAccessTokenTicketResult { public GetAccessTokenTicketResult (OAuth20AccessToken accessTokenTicket) { this .accessTokenTicket = accessTokenTicket; } public GetAccessTokenTicketResult (ResponseEntity<Object> responseEntity) { this .responseEntity = responseEntity; } private OAuth20AccessToken accessTokenTicket; private ResponseEntity<Object> responseEntity; public boolean hasError () { return this .accessTokenTicket == null ; } } }
十三、如何在新建的controller中获取登录状态 13.1 获取登录状态方法示例 : 1 2 3 4 5 6 7 8 9 10 11 12 13 14 15 16 17 18 19 20 21 22 23 24 25 26 27 28 29 30 31 32 33 private boolean isNotLogin (HttpSession session , HttpServletResponse response) throws IOException { Object ticketGrantingTicketIdObj = session.getAttribute("ticketGrantingTicketId" ); if (ticketGrantingTicketIdObj == null ){ response.sendRedirect("/cas" ); return true ; } String ticketGrantingTicketId = ticketGrantingTicketIdObj.toString(); val ticketGrantingTicket = centralAuthenticationService.getTicket(ticketGrantingTicketId, TicketGrantingTicket.class); if (ticketGrantingTicket == null ){ response.sendRedirect("/cas" ); return true ; } Authentication authentication = ticketGrantingTicket.getAuthentication(); if (authentication == null ){ response.sendRedirect("/cas" ); return true ; } Principal principal = authentication.getPrincipal(); LoginInfoContextHolder.setLoginInfo(principal); return false ; }
13.2 添加登录验证的拦截器 需求就是说在编写接口时,如果每个接口都写一个判断是否登录的代码不免有些麻烦了,所以我们通过编写一个springMvc的拦截器来进行全局的一个登录判断。
话不多说上代码
1、登录信息存储的ThreadLocal封装 LoginInfoContextHolder.java
1 2 3 4 5 6 7 8 9 10 11 12 13 14 15 16 17 18 19 20 21 22 23 24 25 26 27 28 29 30 31 32 @Slf4j public class LoginInfoContextHolder { private final static ThreadLocal<Principal> THREAD_LOCAL = new ThreadLocal <>(); public static void setLoginInfo (Principal o) { THREAD_LOCAL.set(o); } public static Principal getLoginInfo () { return THREAD_LOCAL.get(); } public static void remove () { log.info("清除登录信息" ); THREAD_LOCAL.remove(); } }
2、不需要登录验证的拦截的注解 NotLogin.java
1 2 3 4 5 6 7 8 9 10 @Target({ElementType.TYPE, ElementType.METHOD}) @Retention(RetentionPolicy.RUNTIME) public @interface NotLogin {}
3、登录拦截器
1 2 3 4 5 6 7 8 9 10 11 12 13 14 15 16 17 18 19 20 21 22 23 24 25 26 27 28 29 30 31 32 33 34 35 36 37 38 39 40 41 42 43 44 45 46 47 48 49 50 51 52 53 54 55 56 57 58 59 60 61 62 63 64 65 66 67 68 69 70 71 72 73 74 75 76 77 78 79 80 81 82 83 84 @Slf4j @RequiredArgsConstructor public class LoginInterceptor implements HandlerInterceptor { private final CentralAuthenticationService centralAuthenticationService; @Override public boolean preHandle (HttpServletRequest request, HttpServletResponse response, Object handler) throws IOException { if (handler instanceof HandlerMethod) { HandlerMethod handlerMethod = (HandlerMethod) handler; NotLogin notLoginAnnotation = handlerMethod.getMethod().getAnnotation(NotLogin.class); if (notLoginAnnotation != null ) { return true ; } HttpSession session = request.getSession(); if (this .isNotLogin(session)) { response.sendRedirect("/cas/login" ); return false ; } return true ; } return true ; } @Override public void postHandle (HttpServletRequest request, HttpServletResponse response, Object handler, ModelAndView modelAndView) throws Exception { LoginInfoContextHolder.remove(); } private boolean isNotLogin (HttpSession session) { Object ticketGrantingTicketIdObj = session.getAttribute("ticketGrantingTicketId" ); if (ticketGrantingTicketIdObj == null ) { return true ; } String ticketGrantingTicketId = ticketGrantingTicketIdObj.toString(); val ticketGrantingTicket = centralAuthenticationService.getTicket(ticketGrantingTicketId, TicketGrantingTicket.class); if (ticketGrantingTicket == null ) { return true ; } Authentication authentication = ticketGrantingTicket.getAuthentication(); if (authentication == null ) { return true ; } Principal principal = authentication.getPrincipal(); LoginInfoContextHolder.setLoginInfo(principal); return false ; } }
十四、如何在controller中返回错误视图信息 有以下几种方式提供错误视图,这里比较推荐 case : “3” 中的方式
1 2 3 4 5 6 7 8 9 10 11 12 13 14 15 16 17 18 19 20 21 22 @RequestMapping("test") public ModelAndView test (String a , HttpServletRequest request , HttpServletResponse response , Model model) throws IOException { if (a == null || "" .equals(a)){ return new ModelAndView ("index" ); } switch (a){ case "1" : return WebUtils.produceErrorView(new BadRequestException ("系统异常" )); case "2" : return WebUtils.produceErrorView("error" ,new BadRequestException ("系统异常" )); case "3" : { request.setAttribute("status" , HttpStatus.BAD_REQUEST.value()); request.setAttribute("error" , "系统异常ERROR" ); request.setAttribute("message" , "系统异常ERROR的message" ); return new ModelAndView ("error" ); } default : { WebUtils.produceErrorView(request, HttpStatus.BAD_REQUEST,"系统异常" ); return new ModelAndView ("error" ); } } }
这里简单提下error.html中的一些东西
screen.unavailable.message 其实是文本常量,在messages.properties中定义。
附件:各种参考文档 1、如何获取登录状态 : https://fawnoos.com/2019/06/14/cas53x-userlogin-ssostatus/
这里面的cookieManager好像没用
Apereo CAS - 扩展 Web 流 : https://fawnoos.com/2018/06/19/cas53webflow-extensions/